

Develop Powerapps from the Scratch - Series3/3
Hi All,
Here again with the final series 3. You can check out my
previous series to contextually understand this one.
All Right let’s get STARTED
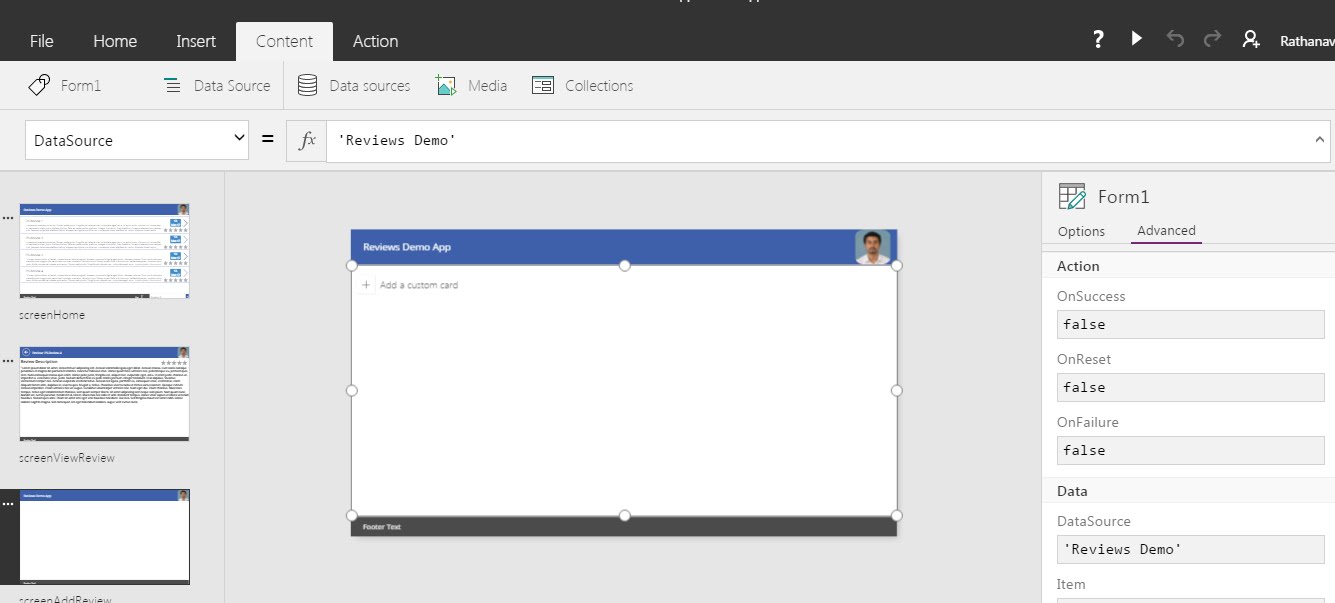
Data source
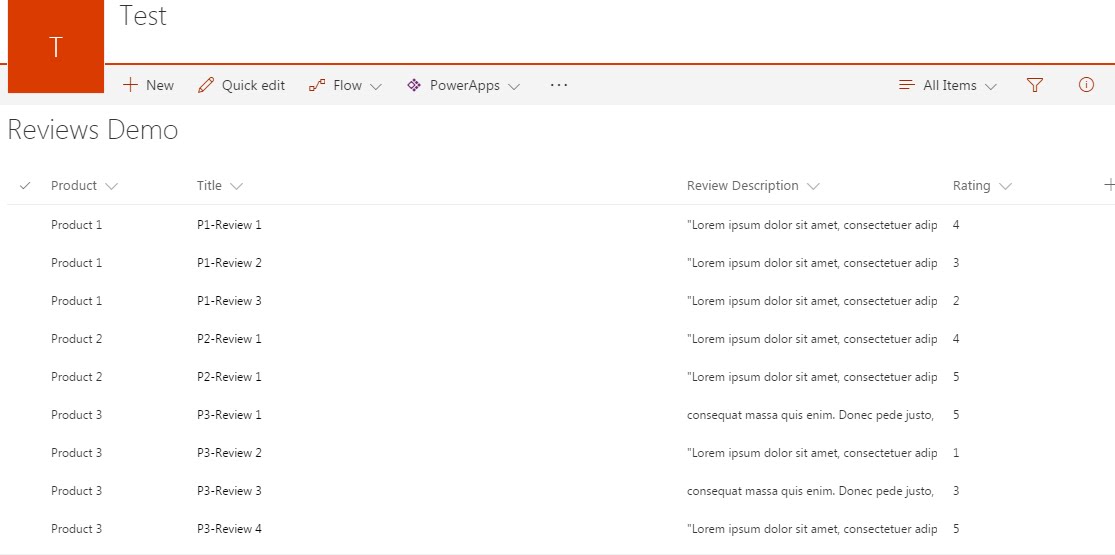
Product
|
Title aka Review Title
|
Review Description
|
Rating
|
Product 1
|
P1-Review 1
|
Long text…
|
5
|
Product 1
|
P1-Review 2
|
Long text…
|
4
|
Product 1
|
P1-Review 3
|
Long text…
|
2
|
Product 2
|
P2-Review 1
|
Long text…
|
4
|
Product 2
|
P2-Review 1
|
Long text…
|
1
|
Product 3
|
P3-Review 1
|
Long text…
|
5
|
Product 3
|
P3-Review 2
|
Long text…
|
1
|
Product 3
|
P3-Review 3
|
Long text…
|
3
|
Product 3
|
P3-Review 4
|
Long text…
|
5
|
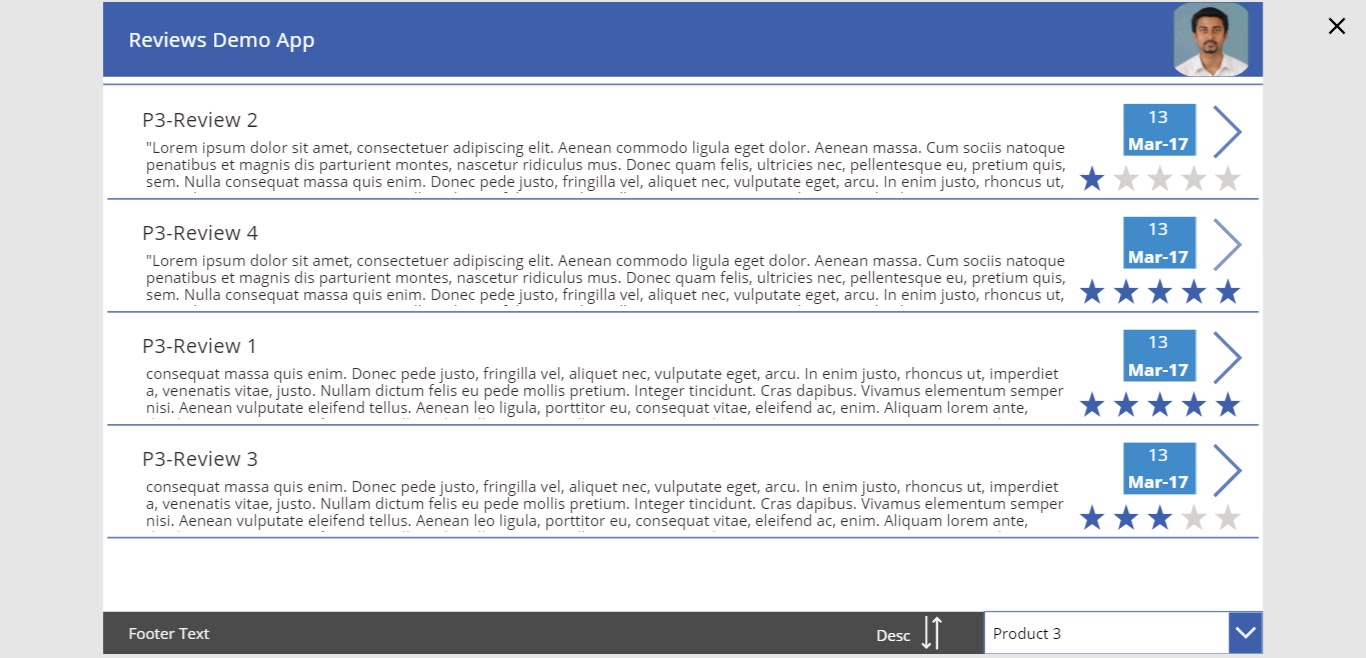
View Review Screen
Add a new screen and rename it to “screenViewReview” or you
can “duplicate” the existing screen and delete the unwanted controls
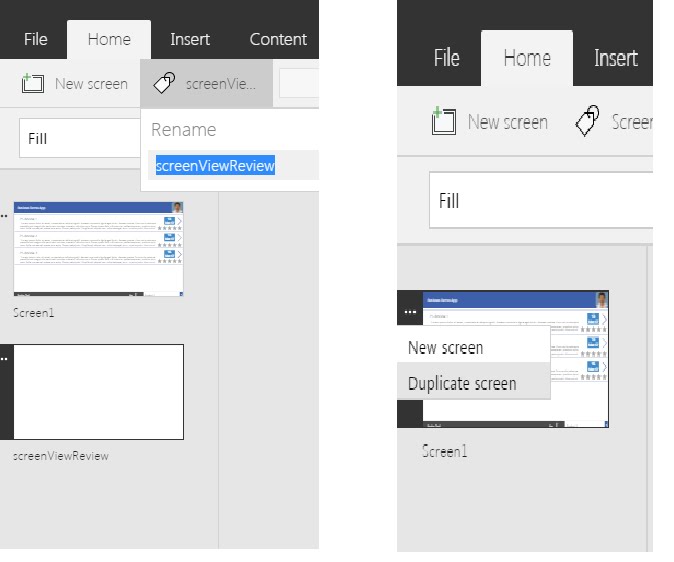
In case if you choose the new screen. Please design it as
per our existing screen. You can refer the series1
post for the same
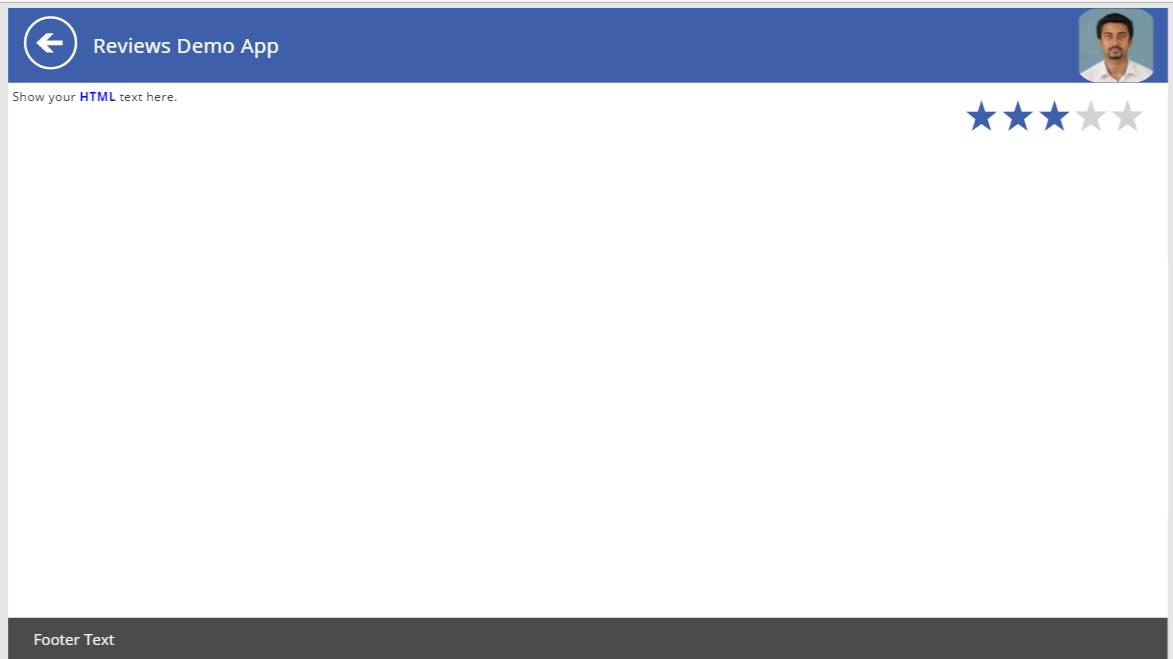
Configure View Review screen
Add below control to configure
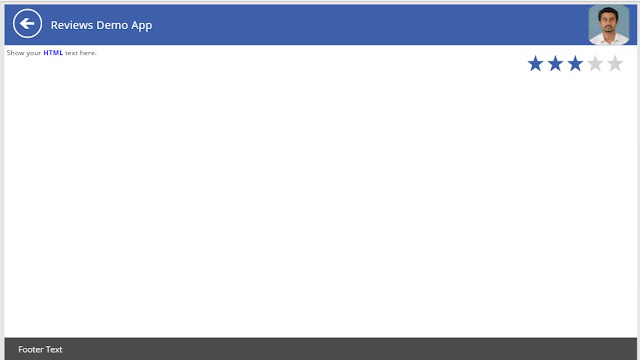

- HTML Control – to show description
- Rating control – to show given rating
- Back Shape – Navigate back to home screen
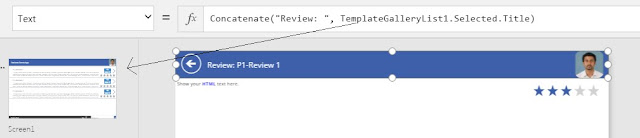
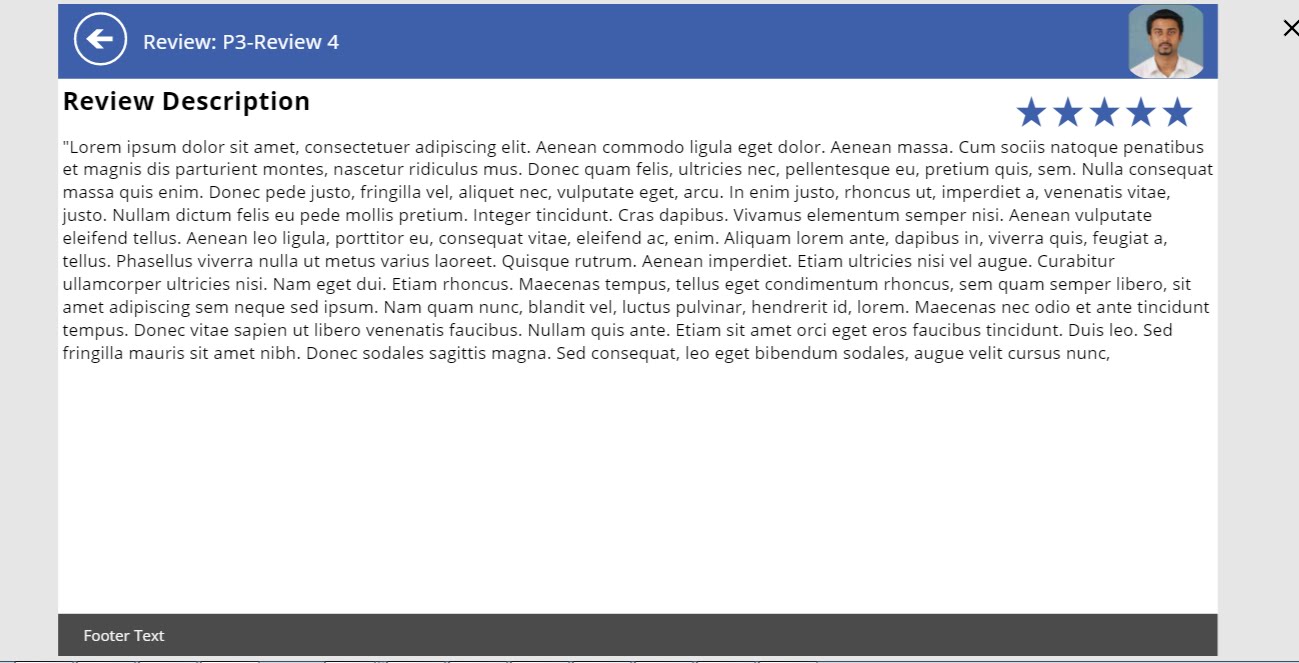
Review Title
Select the top “textbox” and enter the below formula to
APPEND the selected “Review Title”

Note:
TemplateGallertList1 is the items collection from the previous screen. Please
refer series 2 to know more.
Review Description
Then select the HTML control and configure to
show the “Review Description”

Note: We can
alternatively use the two textbox’s to map the “Review Description”. HTML
control was my preferences. Refer here for couple of other examples.
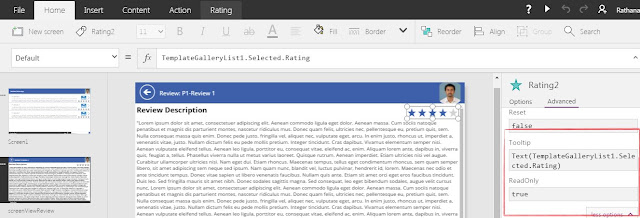
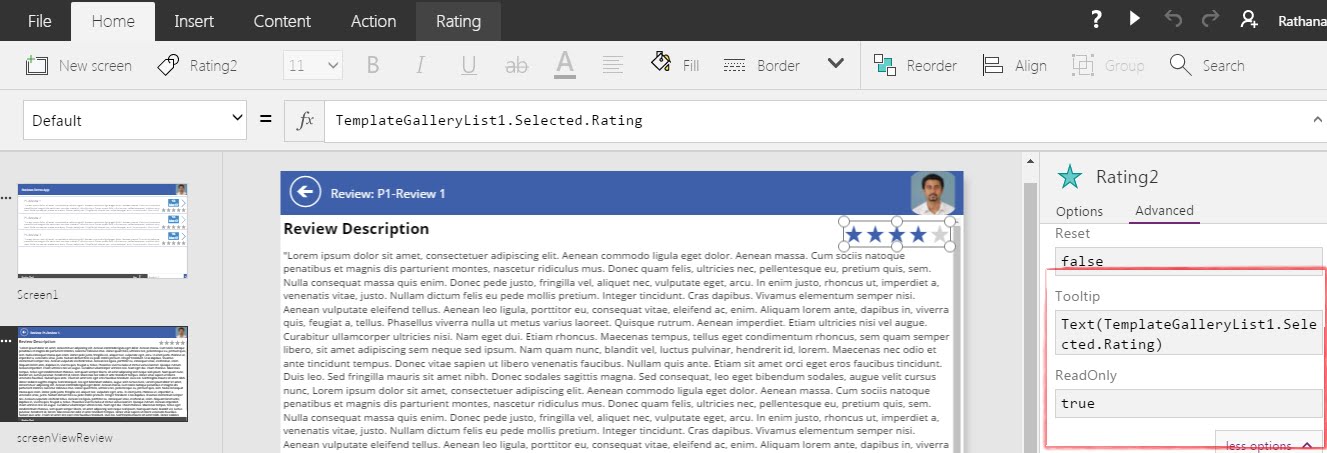
Rating
Select the rating control and map the “Rating”
column for the selected item. Also change the ‘ReadOnly’ and ‘Tooltip’ property
as needed.
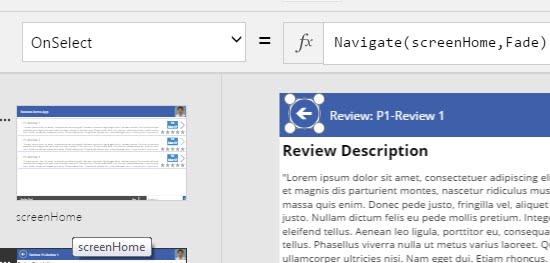
Go Back
Select the back button and write a navigate in the formula
box
Navigate(screenName,
ScreenTransition)

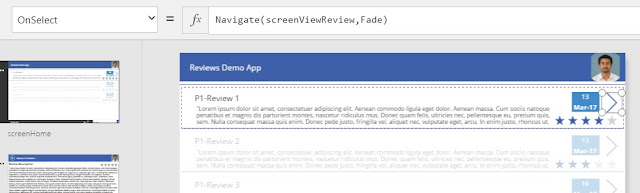
Now, Go to HOME
screen and navigate the select value
Select the go button from the “screenHome” and
configure Navigate option as shown below

Run the Application
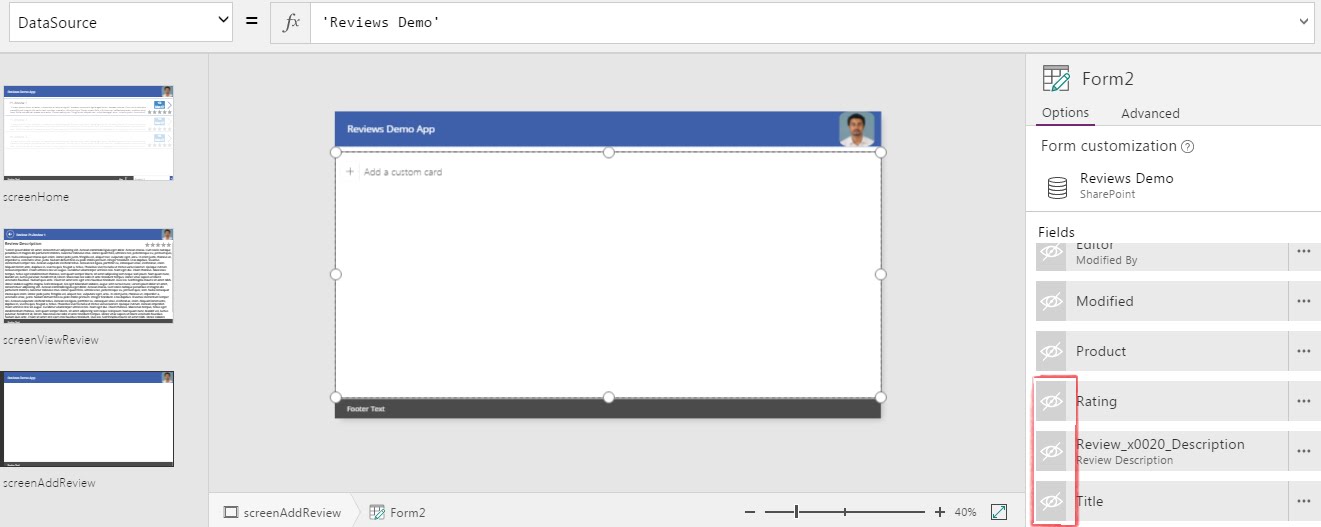
Design screen to add new review
Go to insert->Forms=>Edit
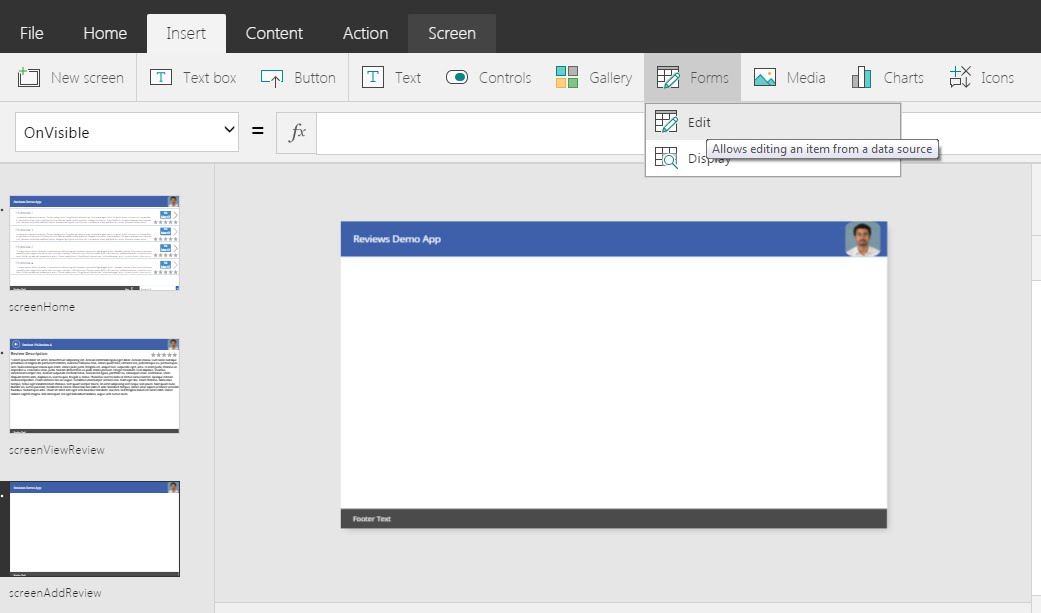
Select the form and set the data source

Once data source is configured. Select the “Edit Form” and
add the columns.
Click on the highlighted icon to add the columns.
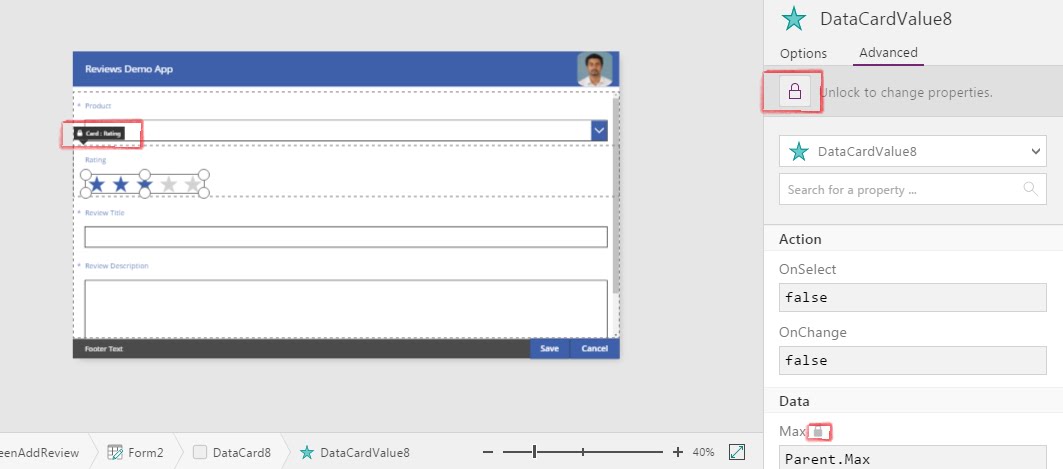
Select rating textbox and do as following
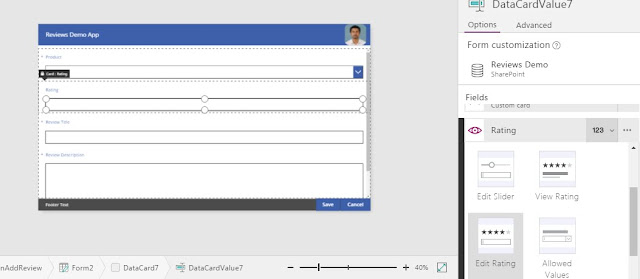
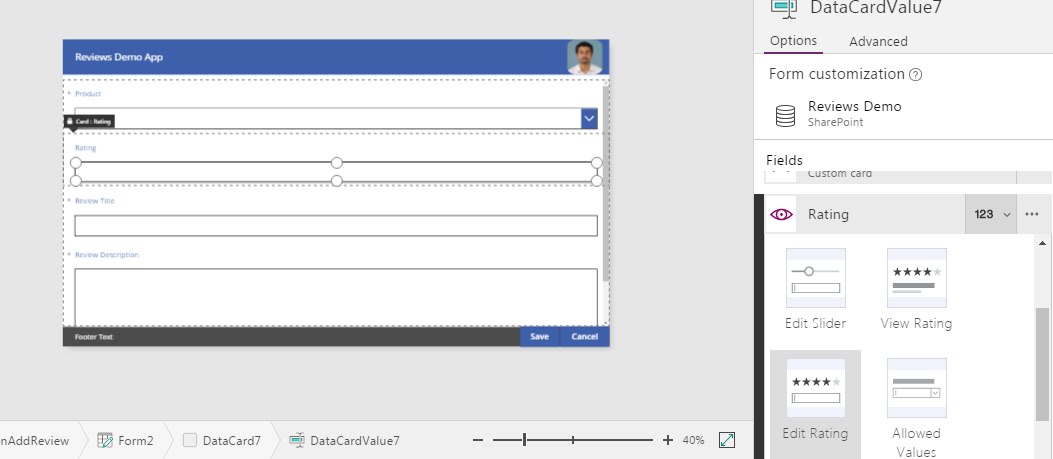
Select
rating “datacard” to and click ‘Unlock’ to edit its properties (same for any
other control) and set ‘Default’ property to 0
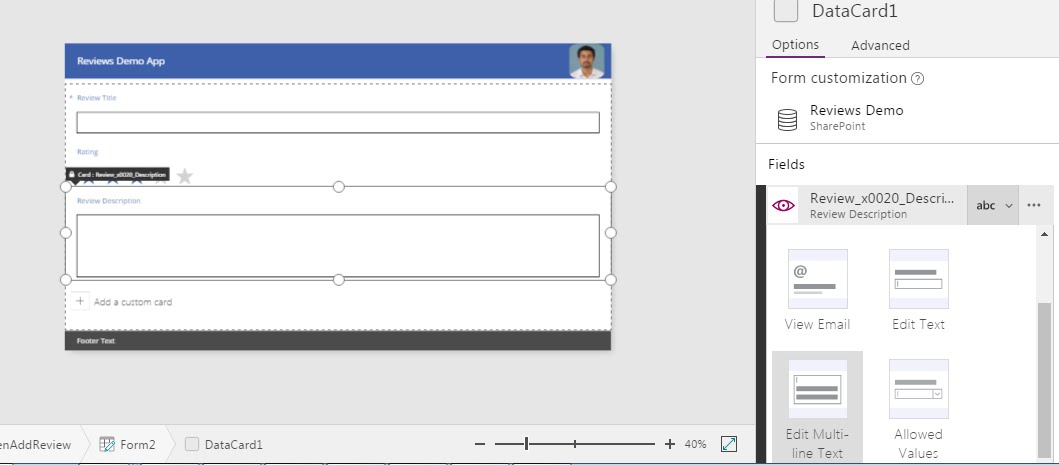
Select “review Description” column and configure it to
support ‘MultiLineText‘
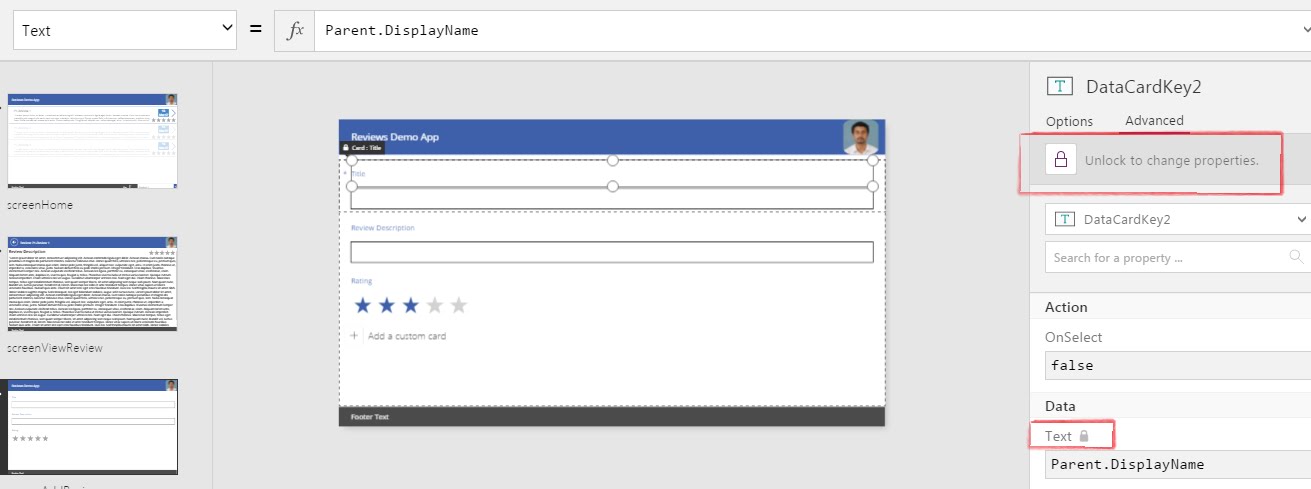
Change the ‘Title’ to “Review Title”. Do the same unlocking
process and edit the ‘Text’ property to “Review Title”
All right, we are all set to add a new review… Nope. Still we
need to do two major things “Product column is missing “PRODUCTS” we need to
add review for a specific product and “Submit/Cancel” form.
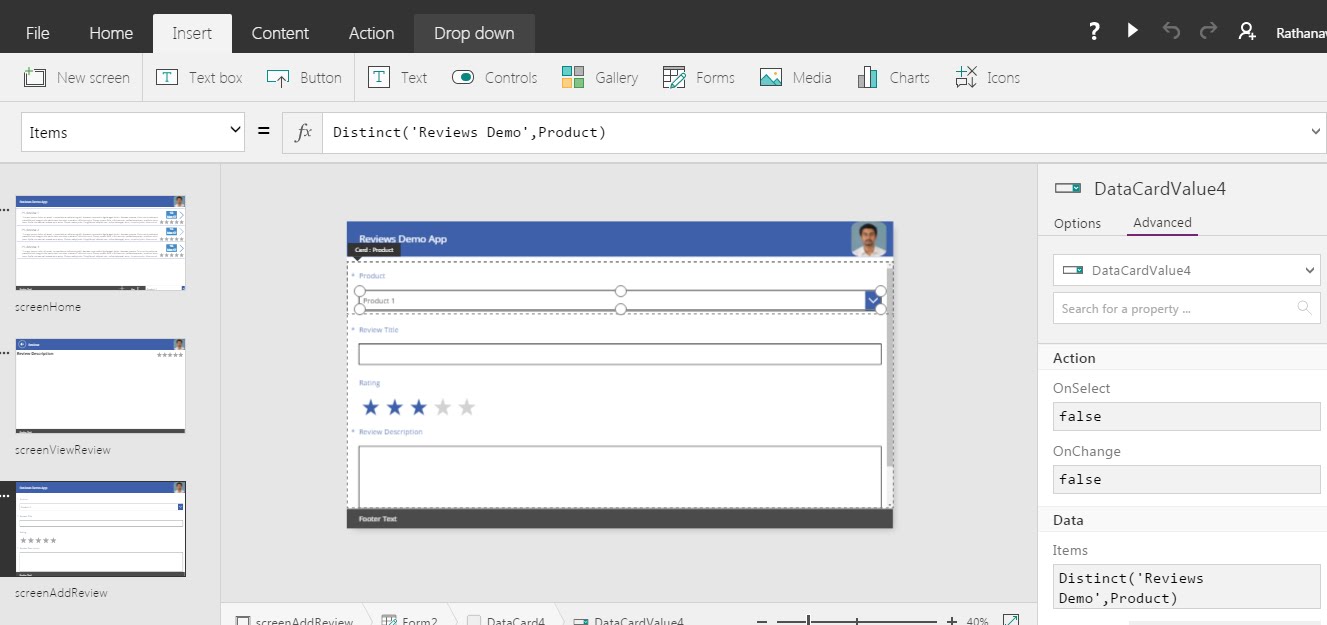
Now add the “Product column” from the right pane
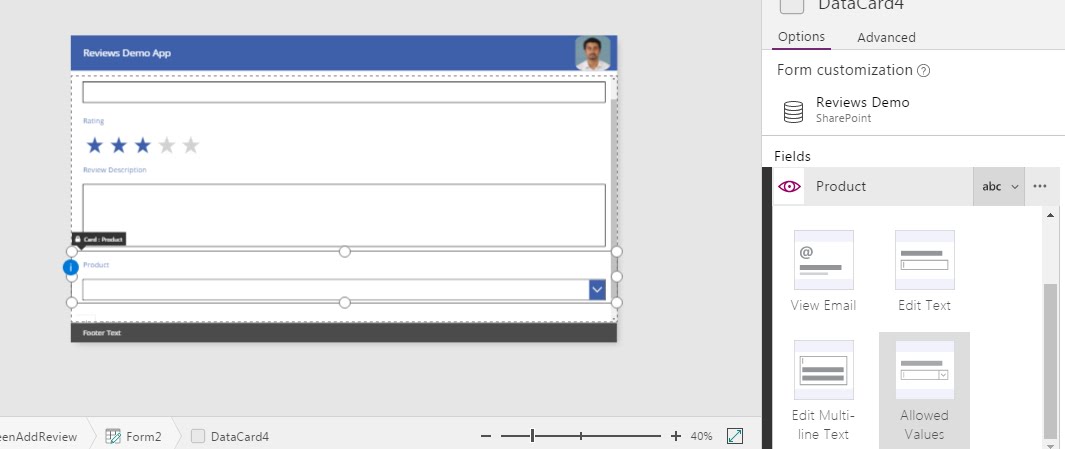
Then unlock the card and add the source to drill down the
available “Products”.
Also select the card and DRAG it to the top of
the Form
Submit/Cancel
Add two control of your choice (anything control which has
onselect property).
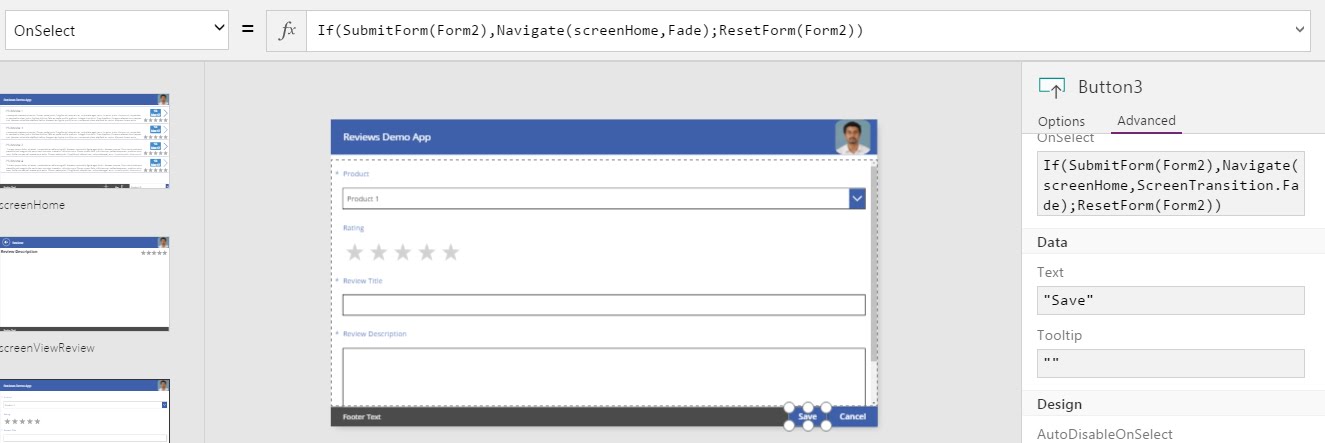
If(SubmitForm(Form2),Navigate(screenHome,ScreenTransition.Fade);ResetForm(Form2))
It does two things:
a.
Save the form after successful validation are
default based on ‘Required’ property.
b.
Navigate back to the Home screen on successful
form submit.
Select cancel and add the following
ResetForm(Form2);Navigate(screenHome,ScreenTransition.Fade)
It does two things:
a.
Clears the screen values to its control default
b.
Navigate back to the home screen.
Note: We can unlock/select
the respective card and mark it as ‘Required’ by enabling the property from the
right pane for any control.
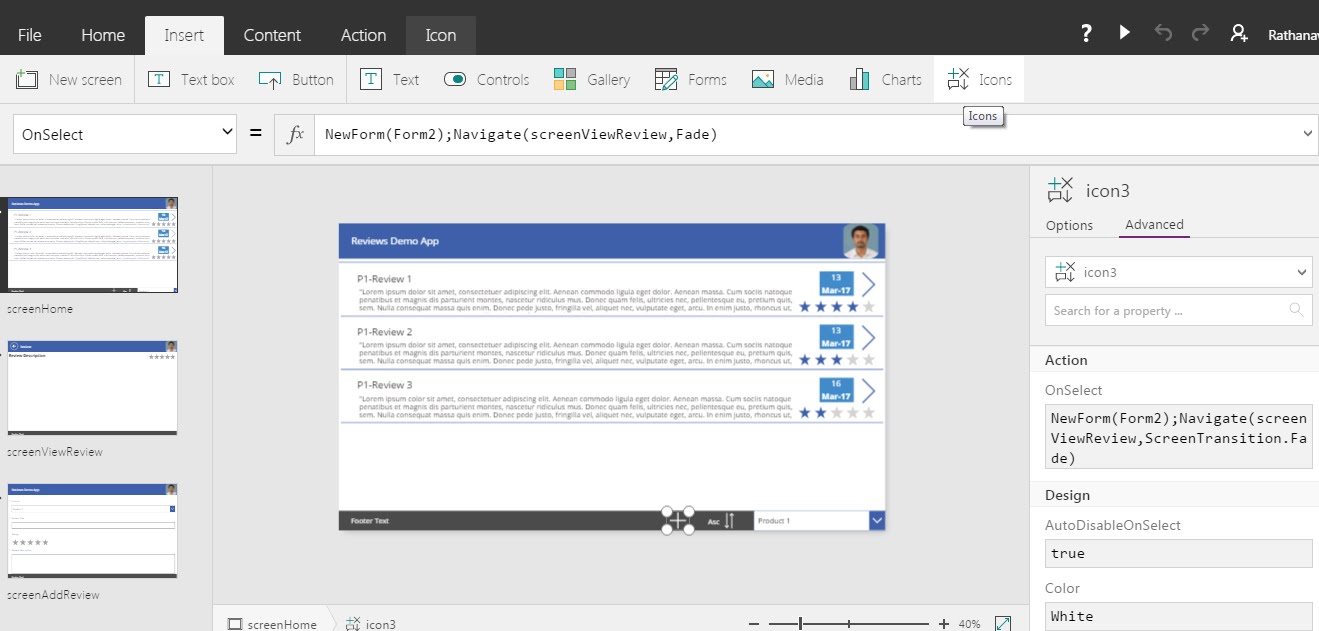
Linking to add review form
Go to the “Home” screen and add new icon or button to
navigate to the new review form
NewForm(Form2);Navigate(screenAddReview,ScreenTransition.Fade)
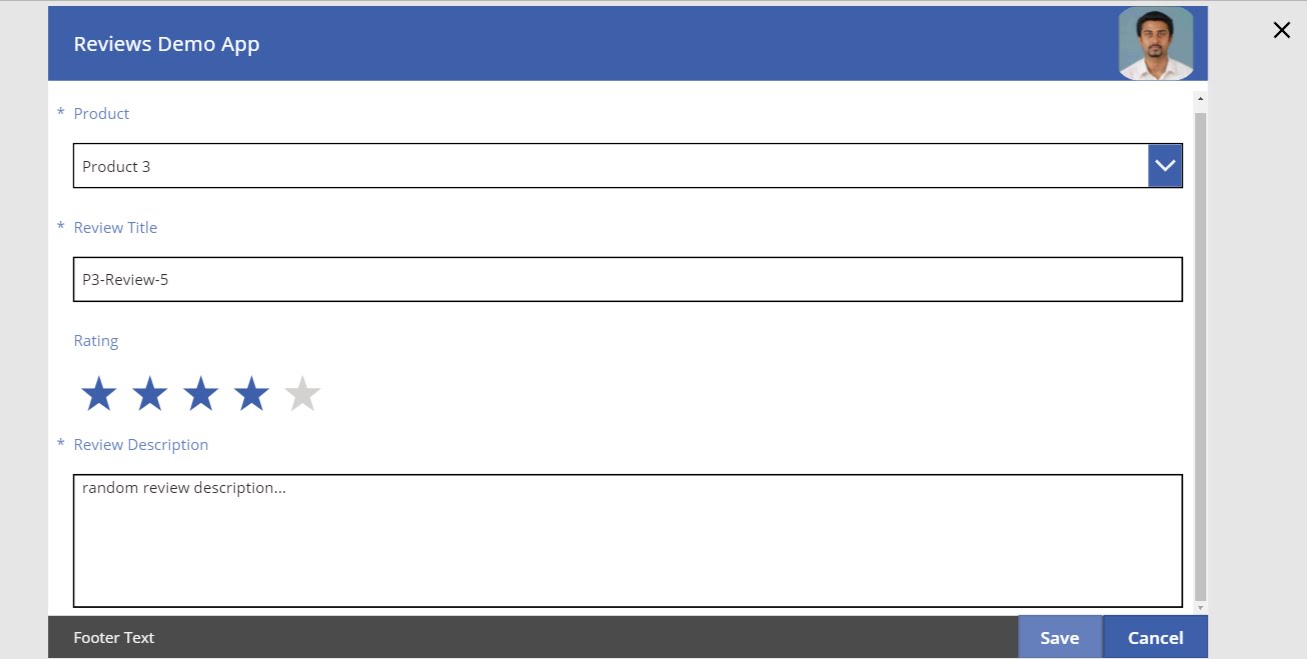
Run the app
That’s all Folks.. Now we have come to the end of this
Develop Powerapps from the scratch series.
You can find my previous series on the below:
Thank you!
Regards


Nice work. thanks for the detailed explanations!
ReplyDeleteThank you! Jose.
Delete