Posts

Modern page provisioning using page template

Image
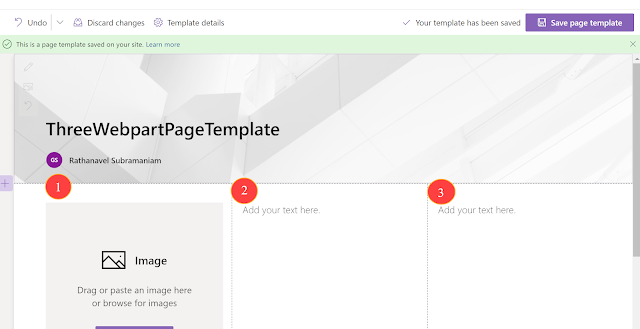
In this article let's see how to dynamically provision a modern page based on a modern page template and update its webpart properties using pnp/js in SPFx React webpart. Create a modern page template Create a page and add the webpart as per your requirements, finally save it as a template. it will be stored under the  "Templates" folder in SitePages. In the below example I have as Section=>3 Colum layout=>3 webparts. Create a page provision form component public   render ():  React . ReactElement < IDynamicPageCreaterProps > {      let   thisHandler  =  this ;      return  (        < div >          < h1 > { this . props . webpartName } </ h1 >           {           ( this . props . selectedTemplate  !=  undefined ) ?              < h4 >< i > Selected Template-  { this . props . selectedTemplate . text } </ i ></ h4 >  :              < h4 > Selcte Template in webapart property </ h4 >          }      

Secure When a HTTP request is received Power Automate a.k.a MS Flow

Image
Secure "When a HTTP request is received" connector in MS Flow This connector can act as the Incoming webhook and perform underling business functionality but its very important to protect it to receive payload from unknown audience. lets see the steps to secure this incoming request. Add `when a HTTP request is received as a trigger condition` Provide the required payload a per the needs (optional). change method to POST if you need to use the payload (optional) relativePath: add /{token} (required) Click the ... dots and select "settings" @equals(triggerOutputs()['relativePathParameters']['token'],'YOUR-SECRET-PASSWORD') That's it. your business logic continues... I have added the received 'token' and 'firstName' from my payload for testing. Call the webhook from postman. Replace /{token} from the URL with your secret password. Enter the required payload and click send. Notice : S

Developing custom reusable components in PowerApps

Image
I am very excited to see the latest PowerApps Experimental preview feature  for canvas based PowerApps development & its capabilities. It provides you with the ability to increase your productivity and re-use the same component on all available layouts.  Design & develop it once reuse the component across layouts within PowerApps. How to enable the experimental feature in PowerApps? Step1 - Go to File->App Settings. Step2 - Select Advanced Settings-> Experimental feature->Enable Components The above feature is not listed; then possibly your are not created developer preview environment. Follow these official MSDN instructions . Also, it's important to understand the  Preview & Experimental feature . Create Carousel reusable component in PowerApps Step 1- Click add "New component. Step 2- Add all necessary controls             -> Image control.             -> Label control to show text.             -> Timer to switch slides.

Headless-Daemon calling AAD secured API

Image
In AAD series of articles, we will see how to call the AAD protected secure API from a headless (or) console application and its authentication flows and scenarios. In the previous article, we have seen how to register an app in aad . I recommend you to read to get familiar with the app registration concept. How to call the AAD protected secure API from a headless (or) console application For these types of non-interactive clients, we can use 2 types of authentication flows for different scenarios.    - client_credentials_grant    - username/password The above grant types allow clients to authenticate silently without any user interaction. oAuth 2.0  client_credentials_grant Authentication is done bas ed on the valid "Client Secret" used, so this is available only for the "WebApp Type" app registrations. and copy the below information from the respective app registration for later use.      - ClientID: Client App's AplicationID.      - ClientSe

Step-By-Step Azure AD App Registration

Image
Enterprise developers and software-as-a-service (SaaS) providers can develop commercial cloud services or line-of-business applications, that can be integrated with Azure Active Directory (Azure AD) to provide secure sign-in and authorization for their services. To integrate an application or service with Azure AD, a developer must first register the application with Azure AD. Any application that wants to use the capabilities of Azure AD must first be registered in an Azure AD tenant. This registration process involves giving Azure AD details about your application, such as the URL where it’s located, the URL to send replies after a user is authenticated, the URI that identifies the app, and so on.  In the upcoming series of articles will see different 'grant_type' and which one to use for what scenario? how to use in Daemon-Headless-App calling secure WebAPI - client_credentials/password_credentials how to use in Windows-Forms-App calling secure WebAPI - code_credentia

Approval and auto escalation with time out in Microsoft Flow

Image
Let's see how to create an Approval workflow with timeout and escalation. I have used Office 365 Custom List "item created or modified" as my trigger. Create "Supervisor Approval" Create "Escalation Approval" Specify duration in ISO 8601 format. refer here for more time-out formatting. "Escalation Approval" would trigger only after the "Supervisor Approval timeout" Final Flow -Ratsub